June 16, 2025

cinema/hide-and-seek dress sew-along, day 3

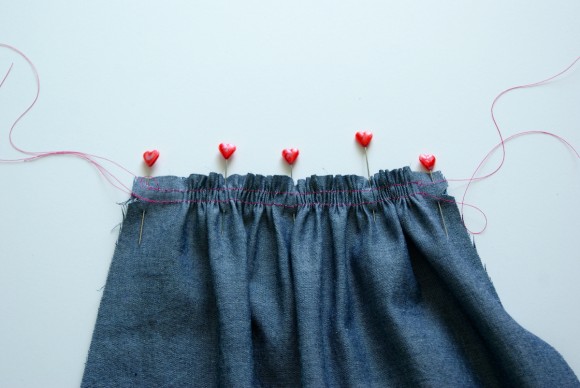
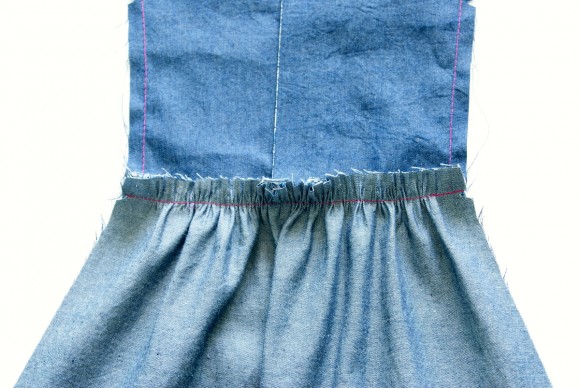
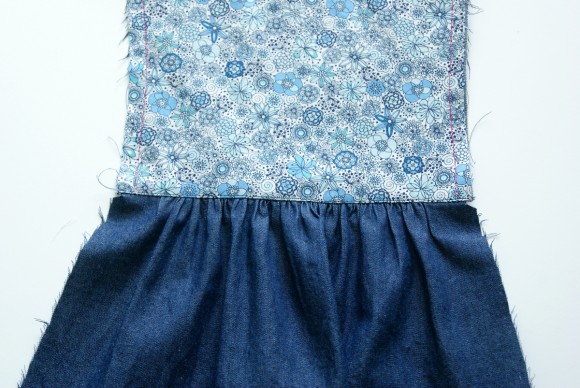
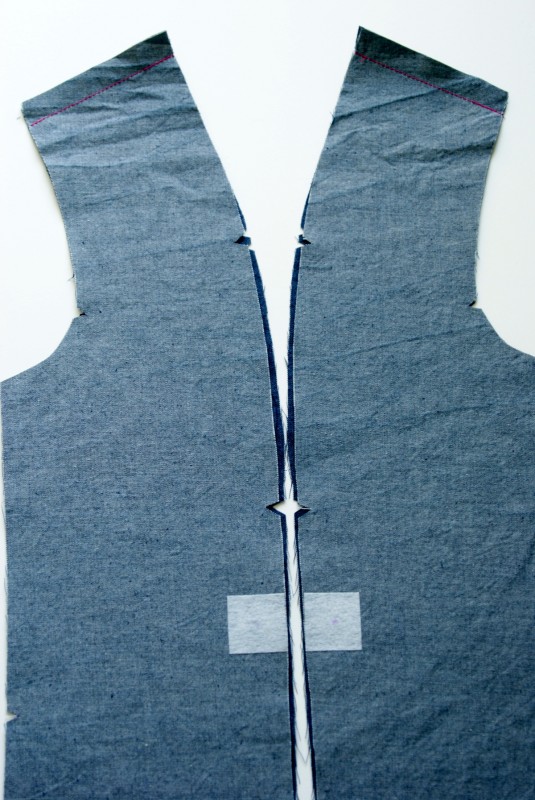
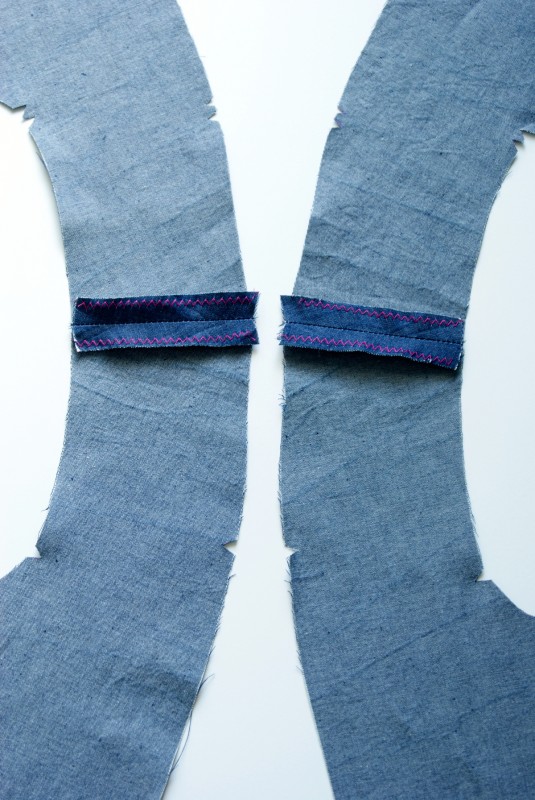
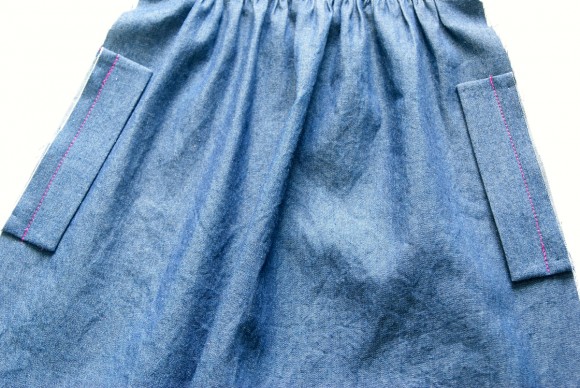
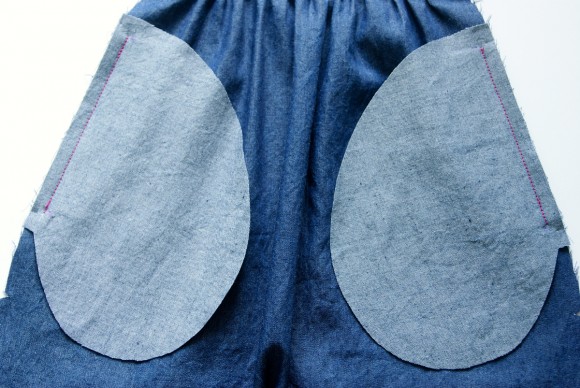
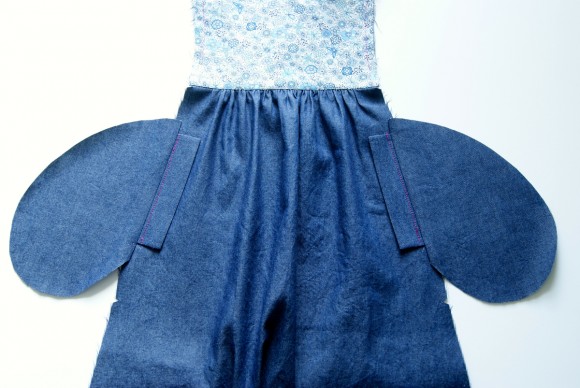
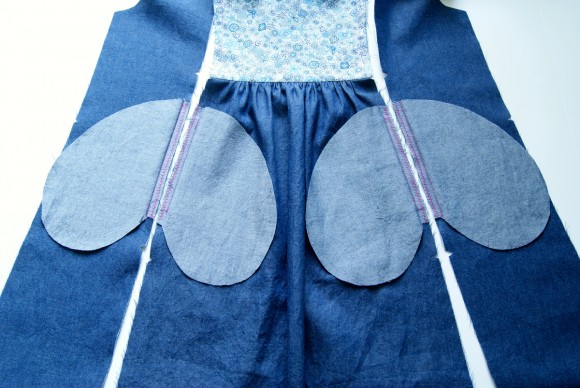
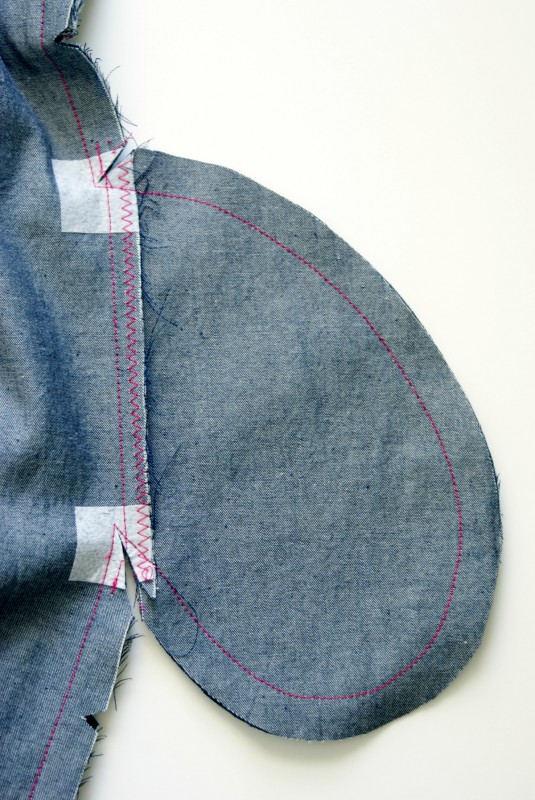
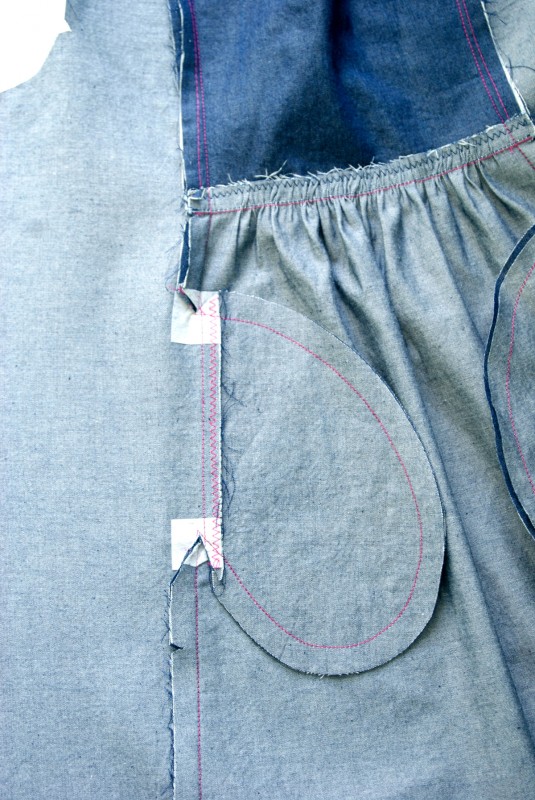
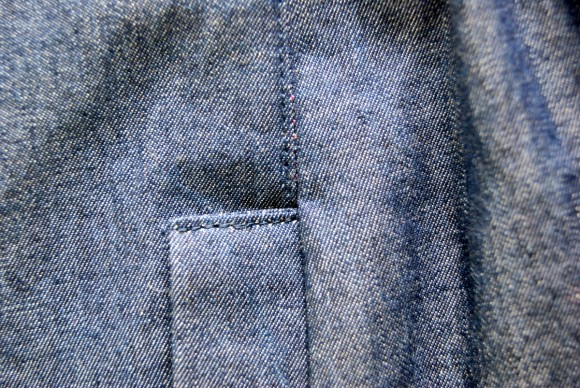
Day three of the Cinema/Hide-and-Seek Dress Sew-Along has arrived! Yesterday, we tackled the pocket welts and yoke. Today, we’ll focus on attaching the skirt, putting together the side panels, adding the pockets, and completing the assembly of the dress. Here’s what we’ll be working on today: ---

Cinema/Hide-and-Seek Dress Sew-Along

We’ve got quite a bit of work ahead of us today, so let’s dive right in! --- ### **Attach the Skirt** First up, we’ll attach the skirt pieces to the yoke. 1. Start by stitching two rows of gathering stitches along the top of the front and back skirts—about 3/8” and 5/8” from the raw edge. Leave a few inches of thread at each end so you can pull the fabric later. Make sure to stop about 1/2” from the side edges of the skirt.

Gatherine stitches on skirt

2. Next, pin the back skirt to the back yoke, aligning the raw edges and center notches. Gather the back skirt until it matches the width of the yoke, distributing the gathers as evenly as possible. Once you’re happy with the fit, stitch the skirt to the yoke with a 1/2” seam, reinforcing the ends with backstitching or lockstitching. Repeat this process for the front skirt and front yoke.

Gathering skirt

Attaching skirt to yoke

3. Finish the seam allowances as you prefer—serging, zigzagging, or folding over. Press the seam allowances toward the yoke, and remove any visible gathering stitches from the top of the skirt. To give the yoke a polished look, edgestitch along the bottom edge, securing the seam allowances in the process.

Iron seam towards yoke

Edgestitch edge of yoke

--- ### **Assemble the Side Panels** Now, let’s work on the side panels. 1. Take one front side panel and pin it to the corresponding back panel at the shoulders, right sides together. Stitch the shoulder seam with a 1/2” seam, reinforcing the ends. Press the seam allowance open and finish it using your preferred method (serging, zigzagging, etc.). Repeat for the second pair of side panels.

Sew side panels together

Finished side panel seams

--- ### **Attach the Pockets** Time to add those functional yet stylish pockets! 1. Pin one pocket welt to the front skirt, positioning it between the dots, with the welt’s folded edge facing center front. Align the raw edges of the welt and skirt, then stitch with a 1/2” seam. Repeat for the second welt on the opposite side of the skirt.

Attach welt pockets

2. Next, pin the pocket piece over the welt, matching the dots, and stitch through all layers with a 3/8” seam. Be sure to start and stop stitching at the top and bottom dots. Press the pocket away from the skirt, keeping the welt in place. Repeat for the second pocket.

Attach pockets

Press pockets away

3. Pin the second set of pockets to the front panels, matching the dots and raw edges. Stitch in place with a 3/8” seam, being mindful of the dots. Press the pockets away from the side panels. 4. Finally, finish the seam allowances at the pocket seams, leaving the rest of the pocket bag unfinished for now.

Finish seam allowances

--- ### **Assemble the Dress** Almost there! Let’s put everything together. 1. With right sides together, pin one side panel to the center dress, aligning the shoulder seams, notches, and pocket dots. Clip into the yoke seam allowances if needed to help match the curves. Stitch the side panel to the center dress with a 1/2” seam, pivoting at the pocket dots to sew around the pocket bag. Repeat for the second side panel.

Sewing side panel

2. Carefully clip into the pocket corners, up to the dots, without cutting the stitches. Press the pockets toward the side panels and finish all seam allowances as you like.

Clip into corners of pocket bag

Press seams

3. If you want to add some extra detail, edgestitch along the side-panel seams, pivoting to stitch down the pocket welts. Alternatively, you can just edgestitch the top and bottom of the welts.

Edgestitch side panels and pocket welts

--- That’s all for today! If you have any questions about the steps, feel free to ask in the comments. See you tomorrow for Day Four of the Sew-Along. --- *P.S. I hope everyone’s enjoying this project—it’s been such a fun journey so far! Don’t forget to share your progress photos—I’d love to see how your dress is coming along.*

Carbon fiber fabric

Carbon fiber fabric is a type of textile made from carbon fibers. It is known for its high strength-to-weight ratio and is used in a variety of applications that require lightweight, durable materials.

Carbon Fiber Fabric,Carbon Fiber Fabric Roll,Carbon Fiber Fabric Sheets,Twill Weave Carbon

Jiangyin Phecda New Material Technology Co., Ltd , https://www.phecdacomposite.com